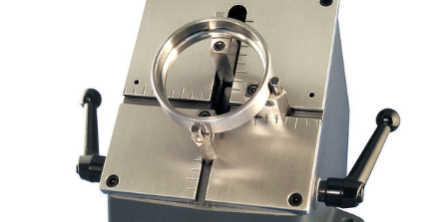
Many of the gages being built today are refinements of gages built 50 plus years ago. They may have originally been designed for use with a 0.0001 inch indicator, but over the years it is likely that the tolerances on your parts have not stayed the same: what was once a 0.0010 inch tolerance is now a 0.0005 inch tolerance or even tighter. Rather than buy new gaging, it may be possible to meet the tighter tolerance demand by improving your old “classic” gages. You can do this if you have the right foundation to build upon.
With good gage design you can’t go against physics. Simple basic principles are the foundation of good gaging. These include all those characteristics we look for in a precision gage today—a gage with a lot of mass for stability, rigid frames and strong joints for stiffness, a sensitive contact in line with reference anvil, and flat parallel surfaces. If your “classics” have all the basics of a high-performance gage, then there are a number of things you can do to increase performance.
Typically, the first step in meeting a tighter tolerance is to replace the dial indicator with higher resolution readouts—usually an LVDT or digital probe. In this case we can replace the 0.0001 inch grad dial with a digital readout having 10 µin. Normally, this would not be recommended. But on some ID or OD gages, or snap gages, the effect of the increased resolution can be tested. If it meets the GR&R requirements, you’re good to go.
Once we have a higher resolution readout, we can start to think about all the little steps in the measurement process that can cost a 0.0001 inch here or there, and in the end provide the best performance possible. Here is a list of steps to squeeze the best performance out of the gaging:
- Replacing the readout with a high-resolution device is important, but it serves no purpose if the readout and probe are not calibrated. Always verify the electronics, and if possible, see if you can calibrate the complete measuring system—the gage, probe and readout system—with a set of Min, Zero and Max masters.
- Cleanliness has always been critical, but when it comes to high resolution gaging, it is a must.
- The same applies to the temperatures of part, gage and master: for best performance they should always be the same.
- When using similar gages throughout the shop, take steps to make sure the gage operating procedure is as identical as possible. Items for improvement include:
- Operator training that is the same for all the users.
- Ensure operators load the part the same way, and standardize a procedure for seating the part and checking repeatability.
- If the gages have adjustable tables for setting the angle of the gage during use, make sure they are all the same.
- Set the gaging force of all the gages to the same pressure—strong enough to secure the part, but light enough to prevent deflection.
- Design gaging jaws and contacts to be the same length, width, and material.
- Use the same style master for setting the gages.
- If master deviations, offsets, or multipliers are part of the set-up process for the readout device, ensure that there is a checklist or a process to ensure all the correct information has been programmed into the readout.
- Check to ensure that the contacts are in good condition—no flats, nicks or worn spots. Also, they should be in line with each other and free from sticking.
- Set up a regular and thorough gage inspection and calibration procedure to maintain top performance.
There is no rocket science to this suggested list of steps to improve performance—and there may be more depending on the application. It is just the basics of good gaging practice. But if you start with these, you may just see those 0.0001 inches of error fade away and those old classic gages really rock.
It may be possible to meet the demand for tighter tolerance by improving your old “classic” gages. You can do this if you have the right foundation to build upon. This 1960s vintage Mahr Federal 36B2 gage has been rebuilt to look new and meet original performance specifications.


